Quick Tip: How to use 2D PDFs in Trimble Connect AR
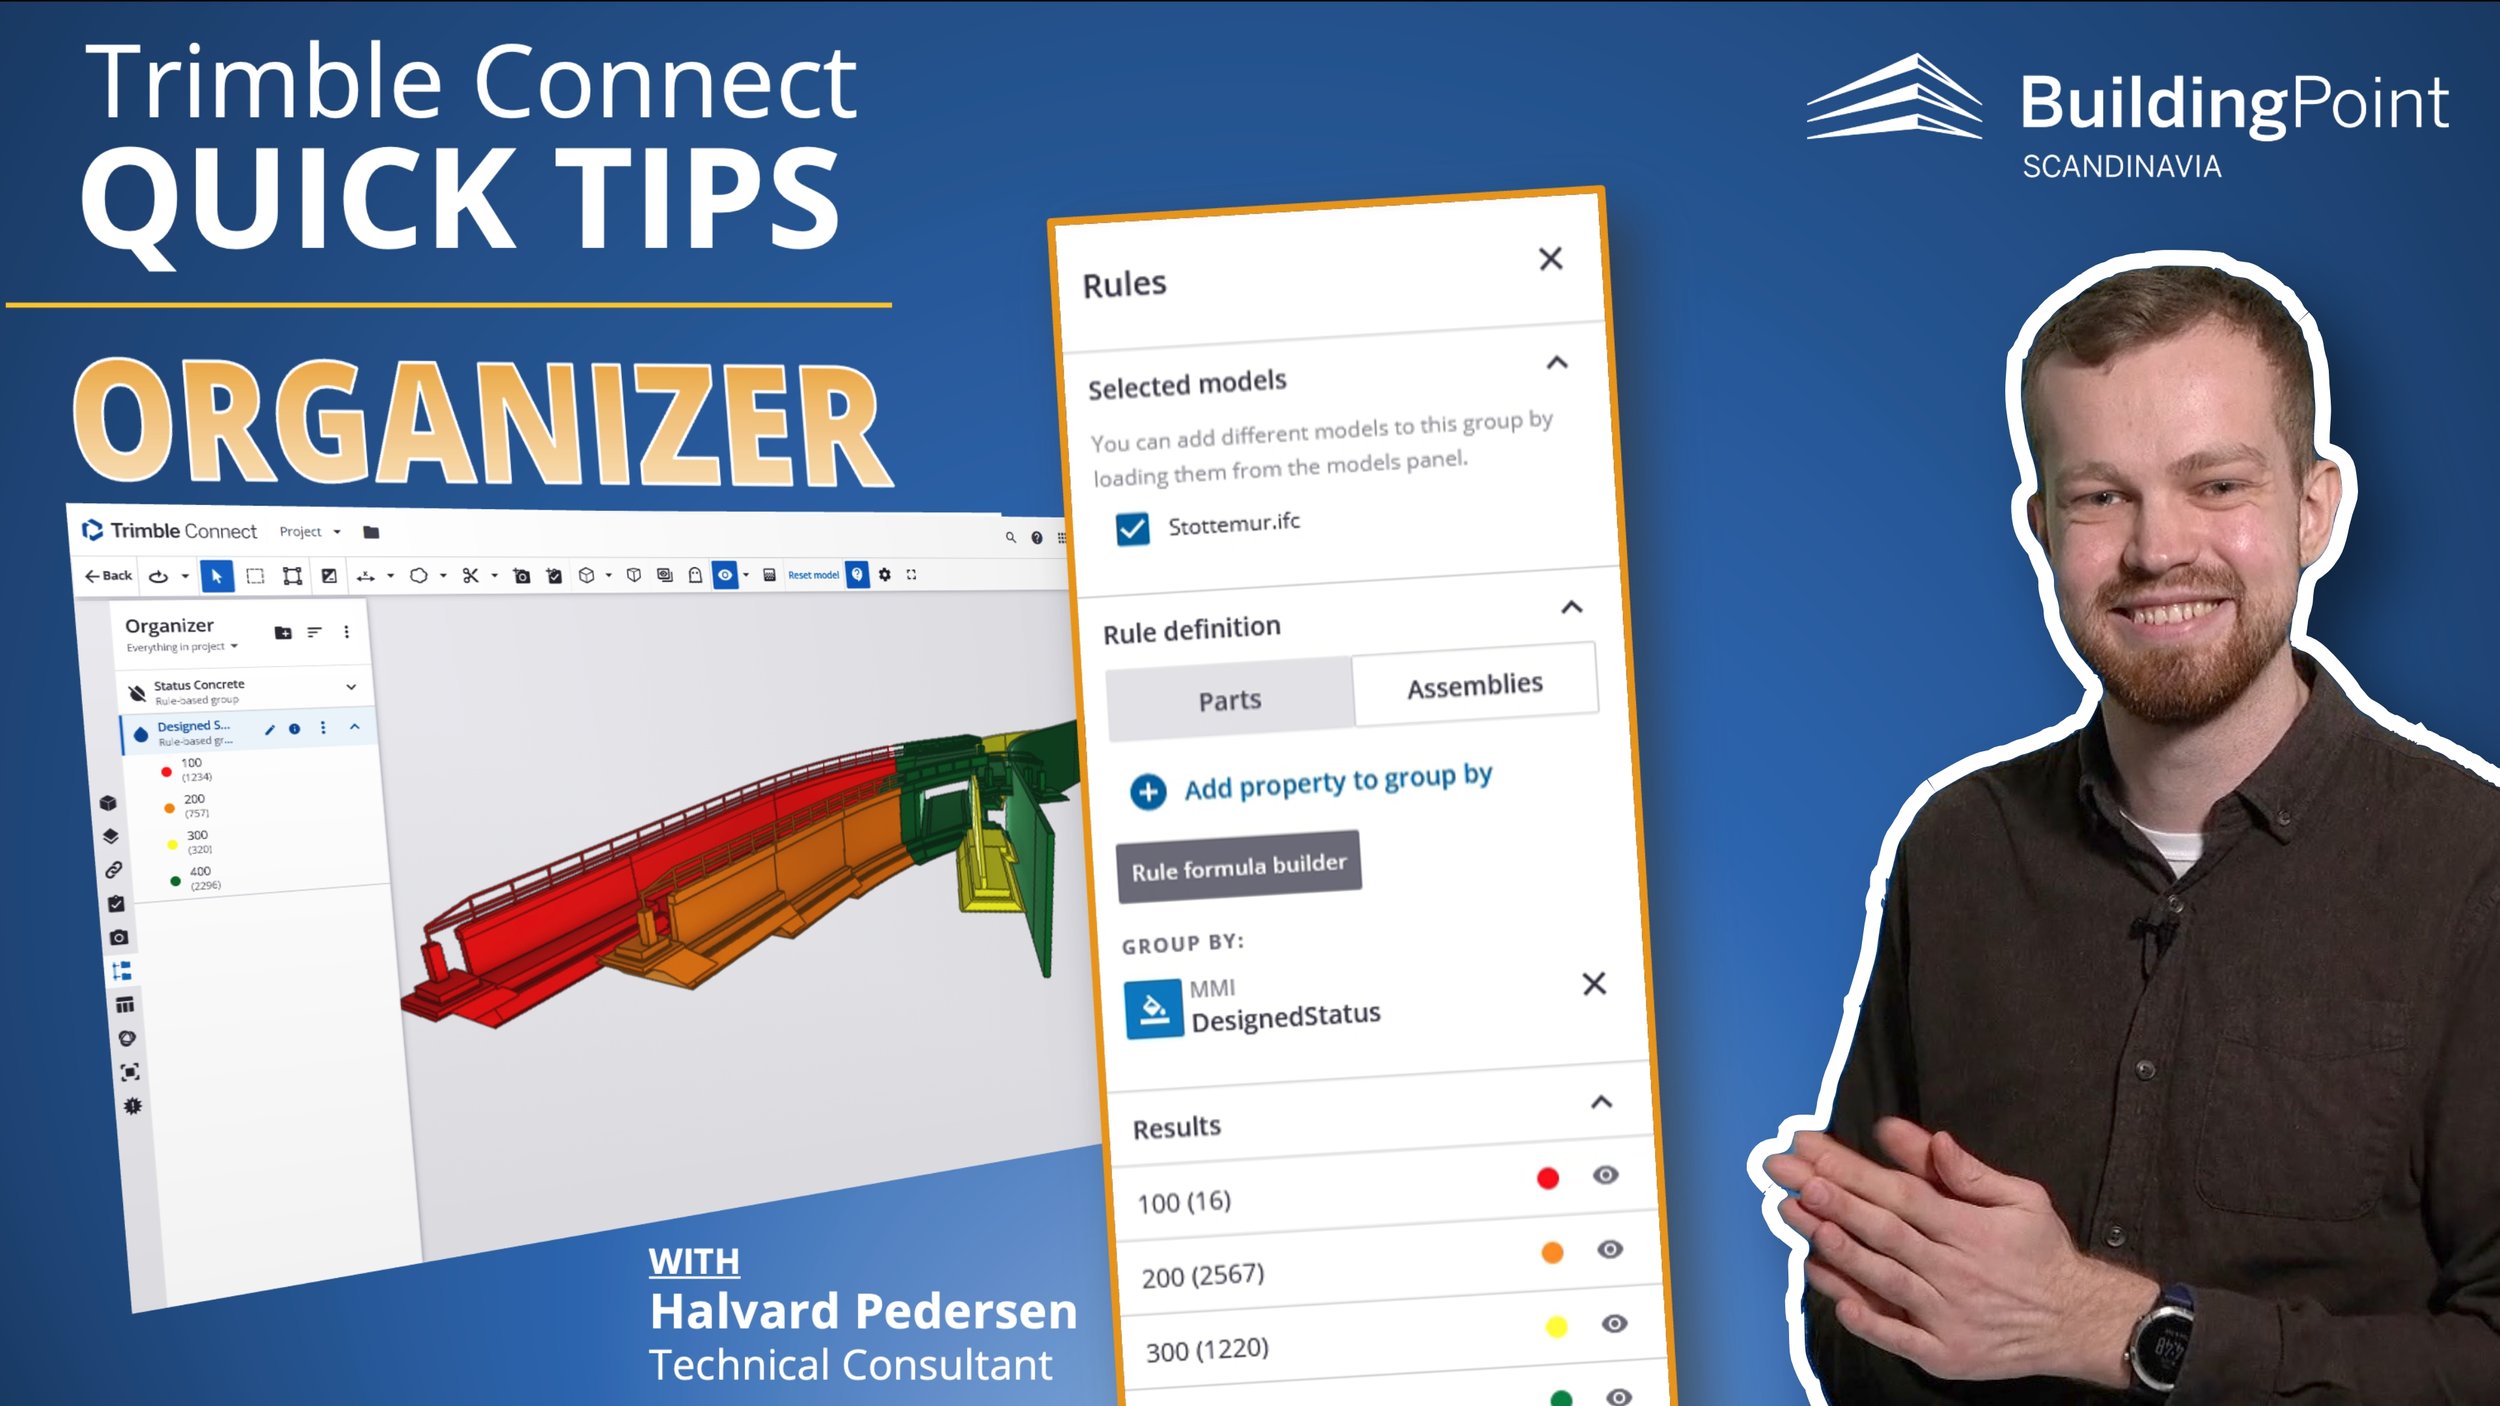
VIDEO: Trimble Connect Quick Tip - Optimizing Project Management with Trimble Connect's Rule-Based Organizer
Did you know that Trimble Connect AR is not limited to 3D models and can take advantage of 2D PDFs as well? In this Quick Tip video, we showcase a use case involving laser scanning, floor flatness analysis, and the powerful capabilities of Trimble Connect AR.
Why use 2D PDF in AR?
In a previous session, we explored laser scanning and floor flatness analysis for a concrete floor. With the findings from that work, the challenge is to communicate these results effectively to our colleagues.
While conventional methods such as sending reports or presenting on tablets work, they may leave room for misinterpretations.
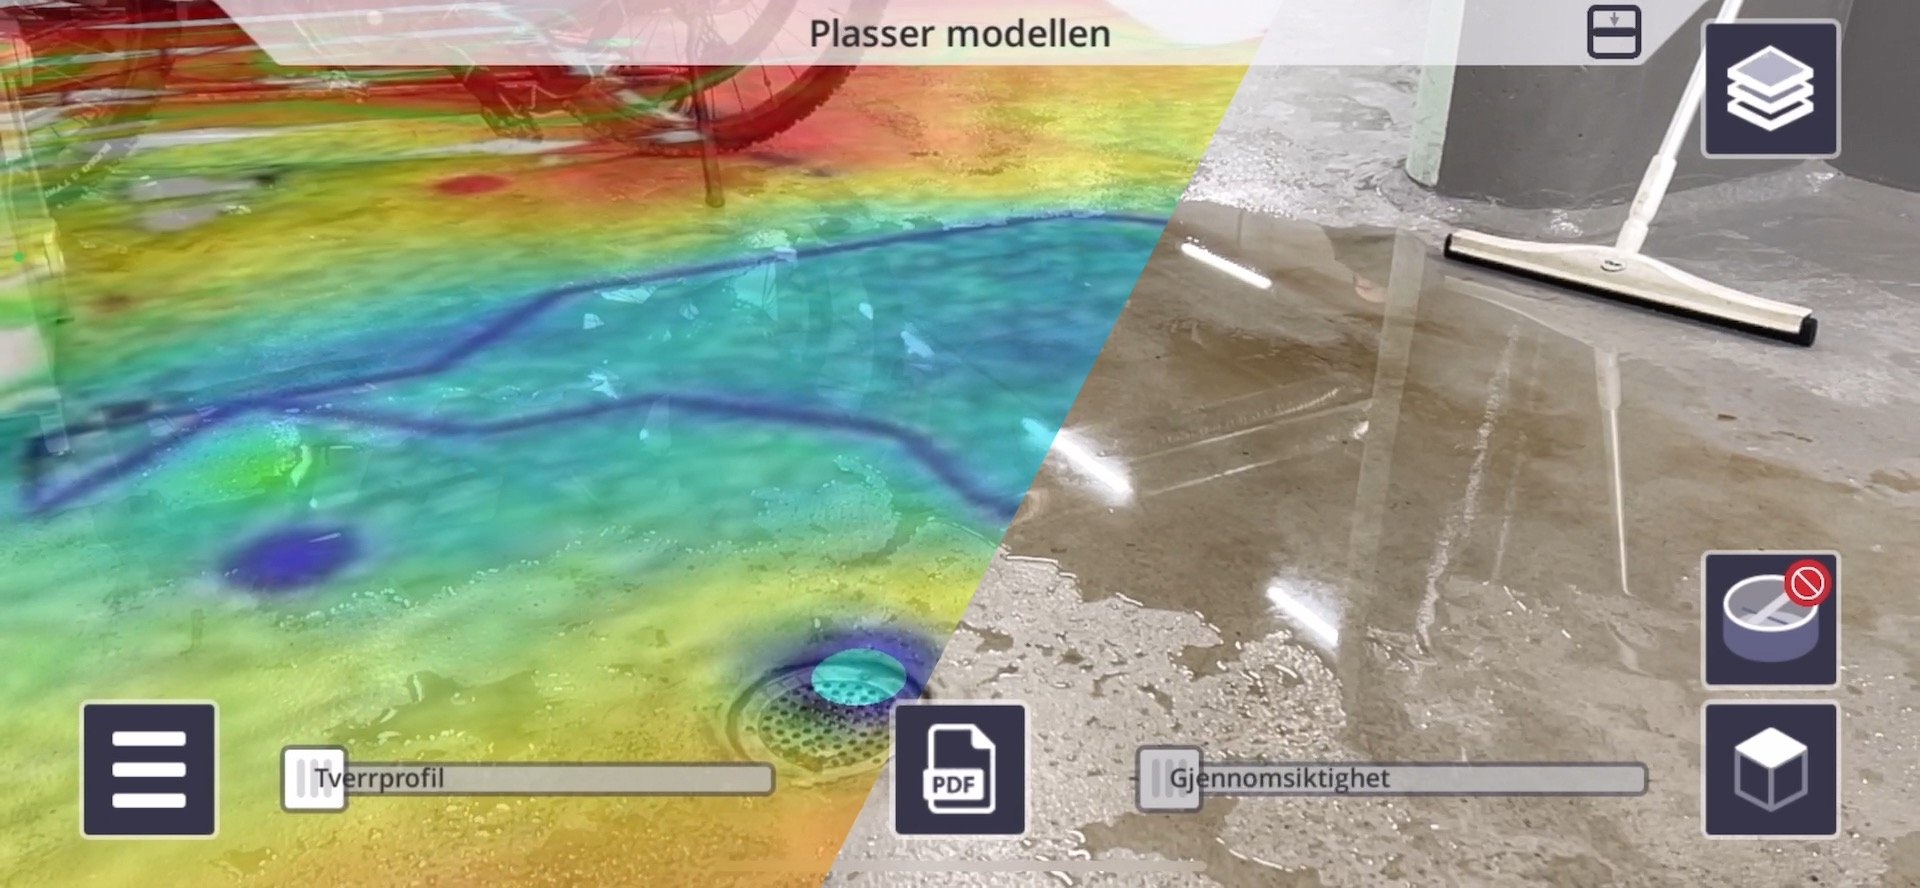
By importing our scan results as a PDF and overlay them onto the real world using Trimble Connect AR we significantly reduce the chance of misunderstandings, providing a crystal-clear visualization of our findings!
How to use 2D PDFs in Trimble Connect AR
Watch the video to see a step-by-step demonstration of how to do this. Additionally the video showcases a very good example of how scanning, floor flatness analysis and AR can be used together!

Step-by-step guide:
Create a PDF using relevant data, such as pictures from the floor flatness analysis.
Upload the PDF to Trimble Connect.
Open Trimble Connect AR and select the PDF from the document library.
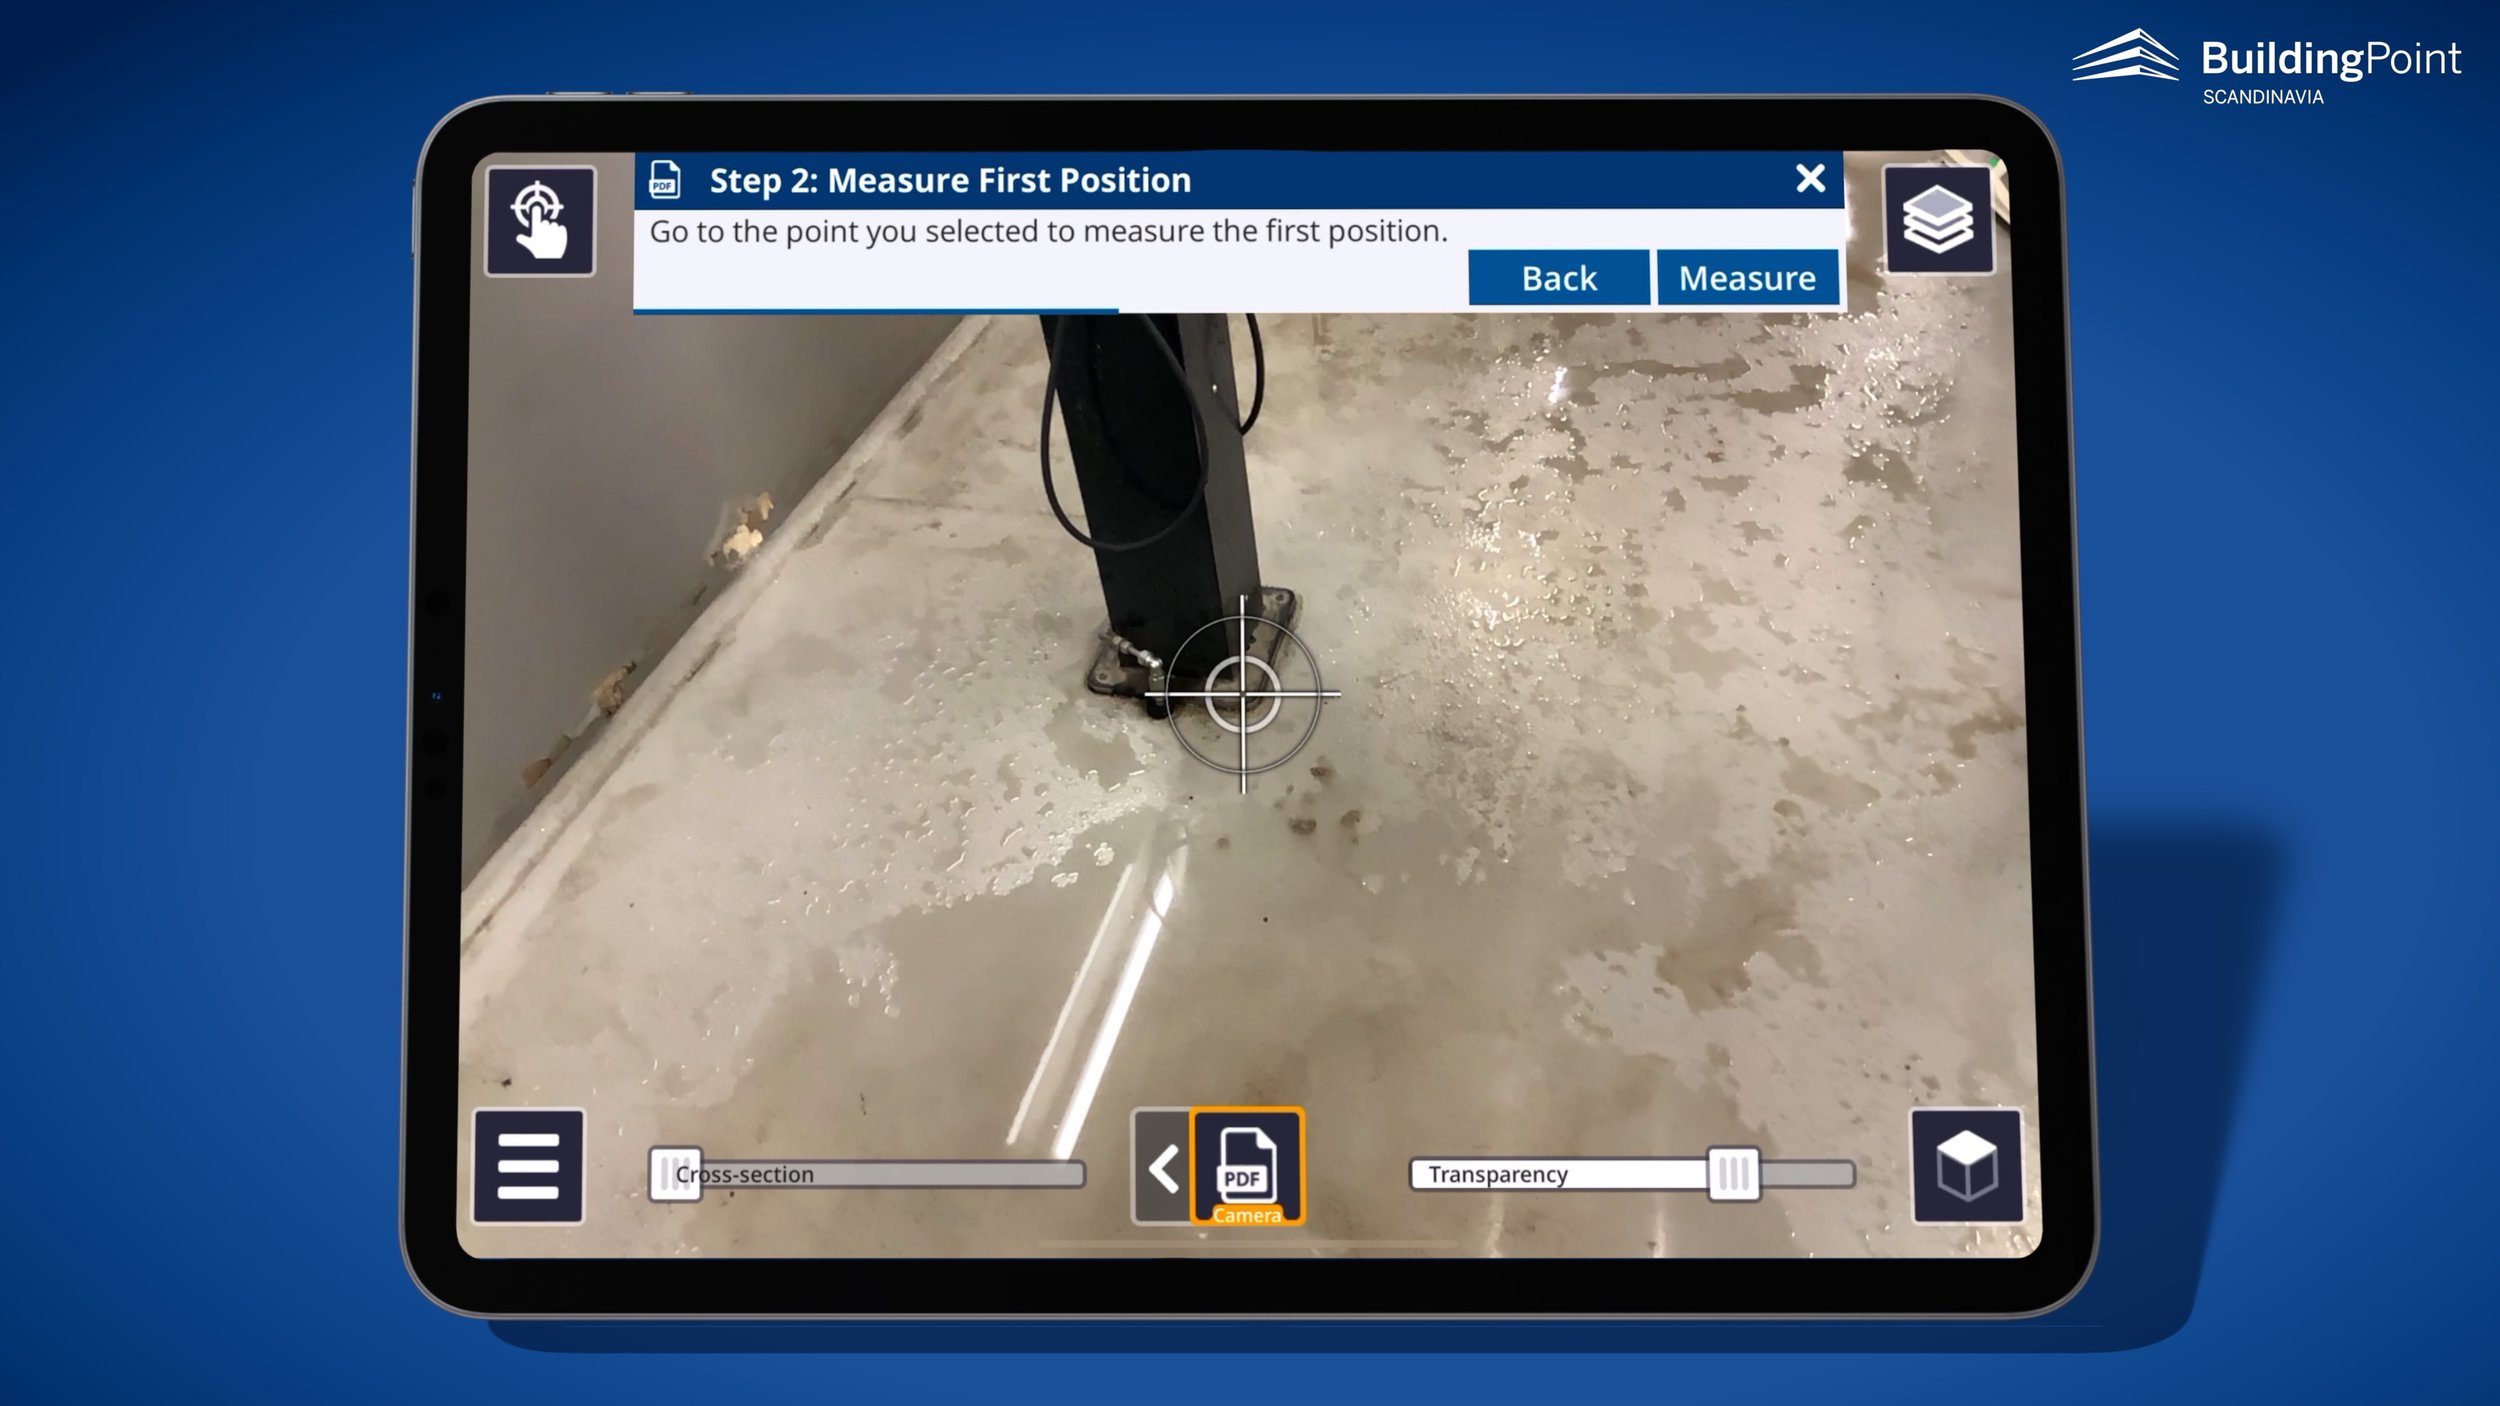
A step-by-step alignment process begins:
First, choose a Plan Point on the document (e.g., a column corner).
Align the corresponding point in the real world and confirm.
Repeat the process for a second point.
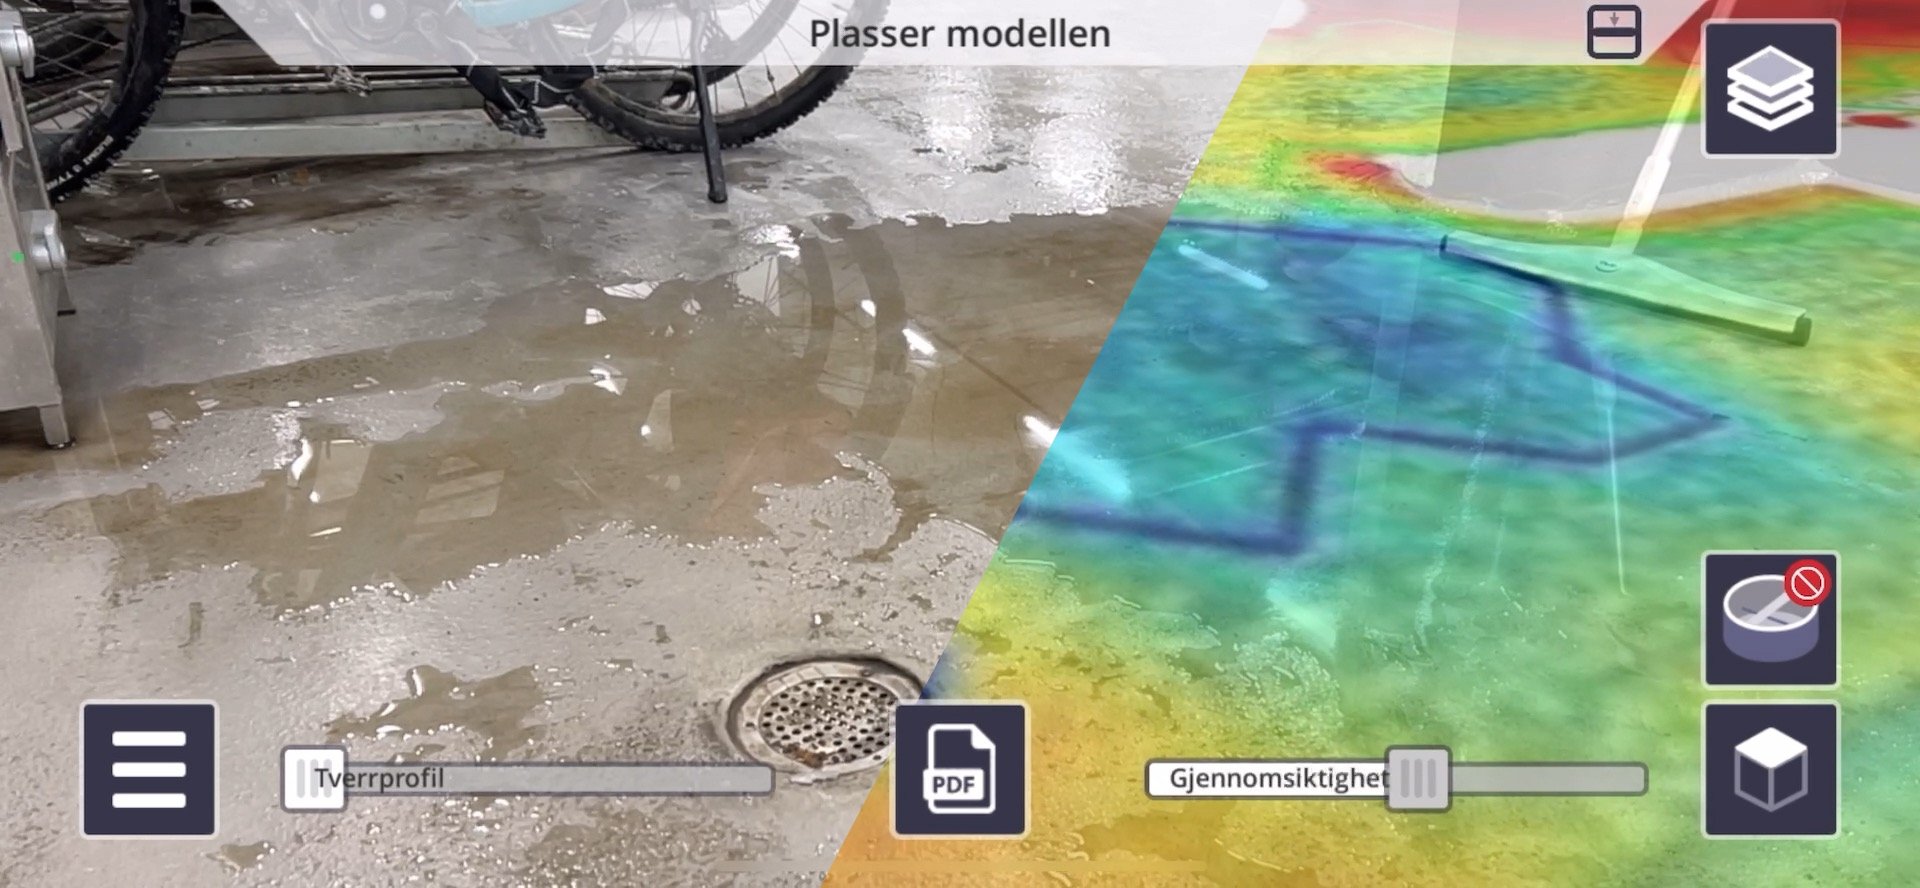
Trimble Connect AR displays the PDF overlaid on the real world, ensuring accurate alignment. Now you can adjust transparency as needed to visualize findings clearly. Share insights with colleagues and even create to-dos on the fly!
Value and insight

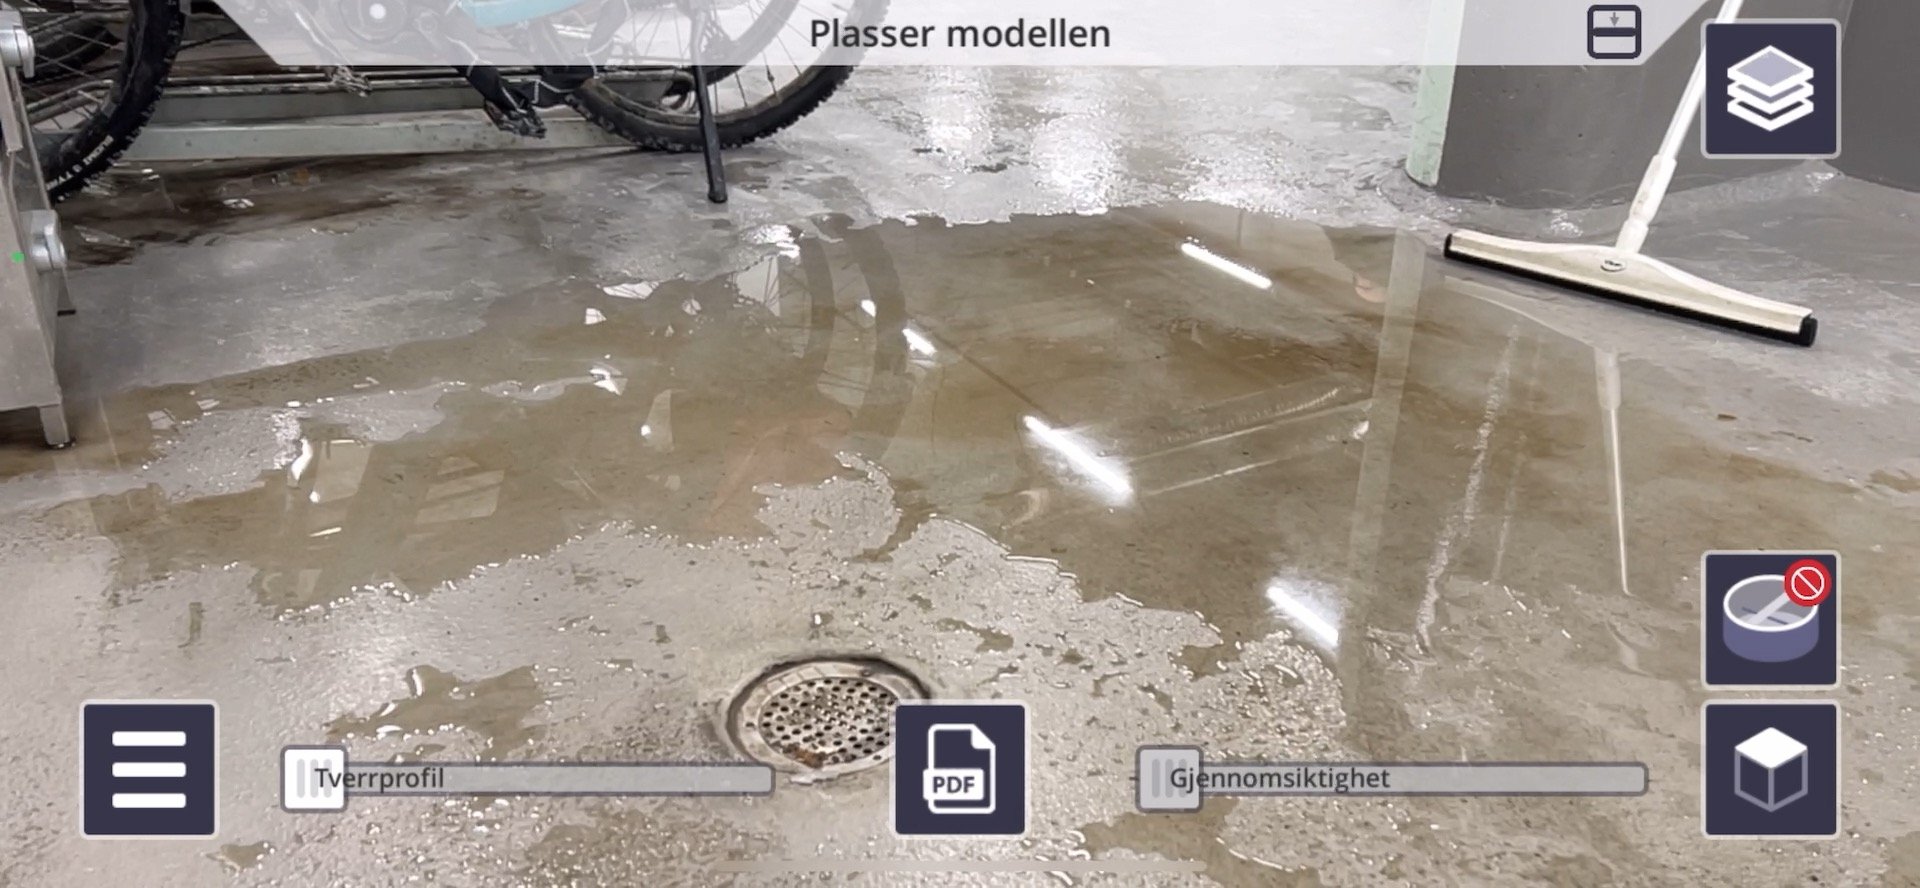
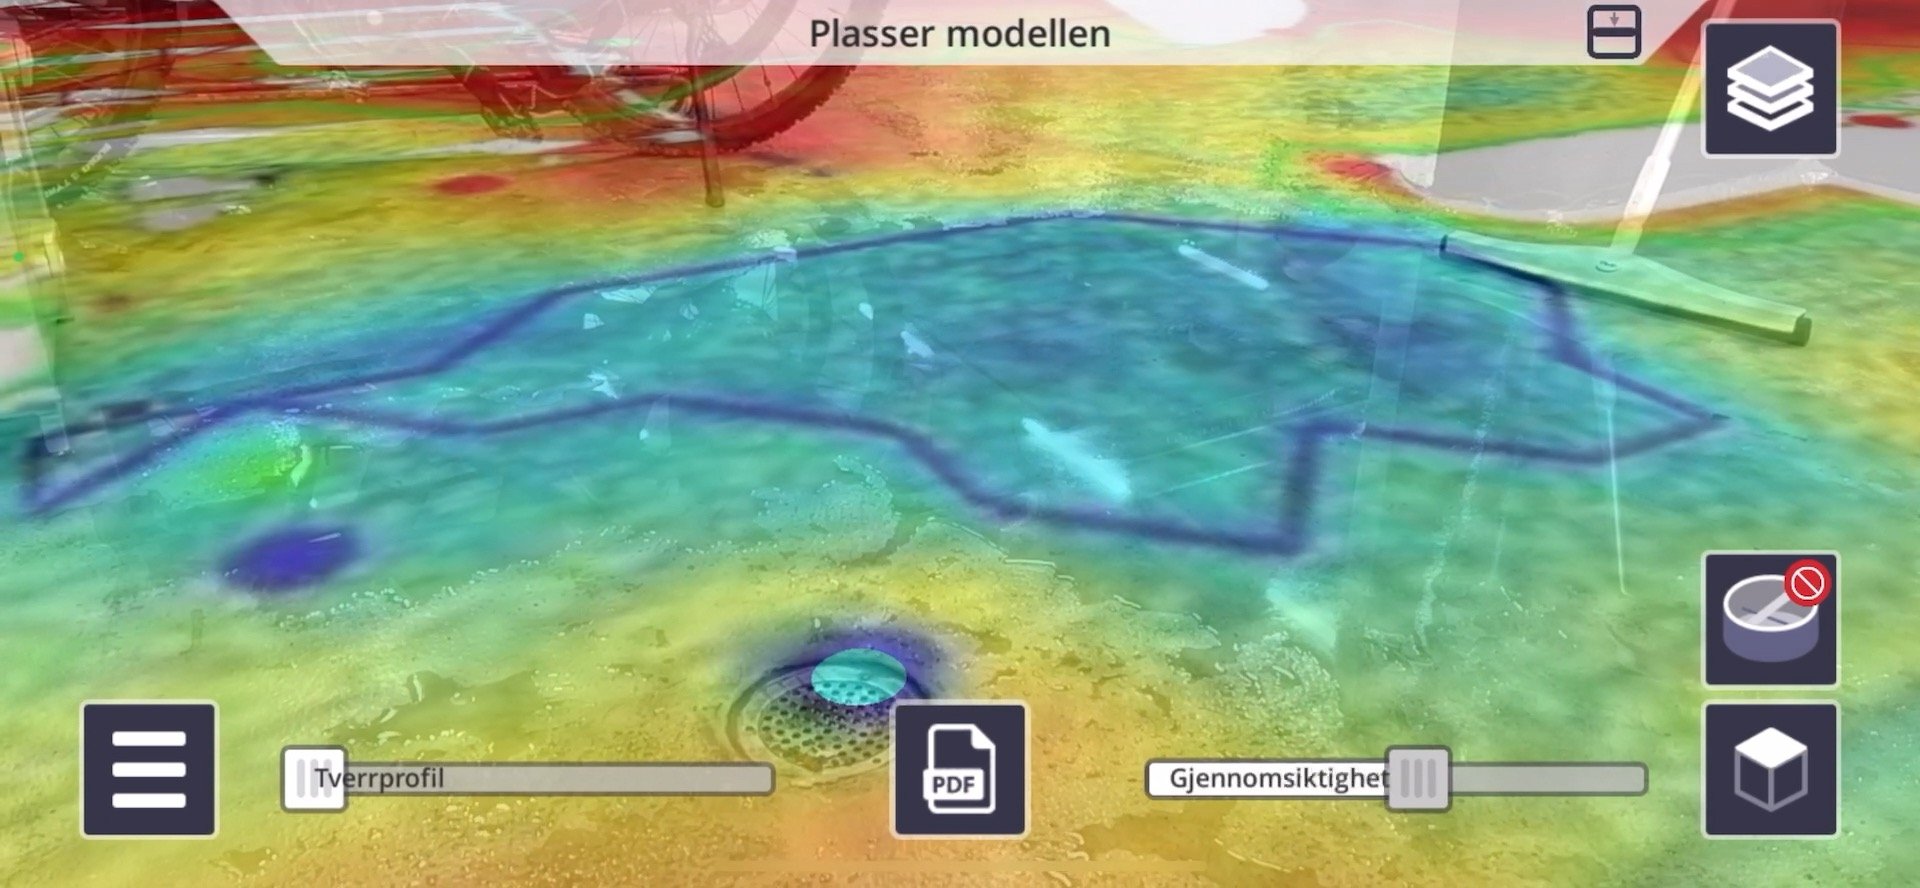
IMAGE: Floor flatness results from laser scanning overlaid on the floor using a 2D PDF in Trimble Connect AR.
In our demonstration, we identify an area adjacent to a drain with lower elevation, leading to water accumulation. This is a great example of how AR can facilitate an intuitive understanding during on-site discussions, minimizing the potential for misunderstandings!
This approach proves valuable not only for floor flatness analysis but also for other documents such as room layout and shop drawings.
Conclusion
Trimble Connect also has the option to use QR markers for automated alignment. However, in this case, our manual method proves very efficient. This approach can help construction teams work with precision and control, making it a practical choice for on-the-spot assessments.
We trust you found this demonstration insightful!
Interested in a FREE TRIAL of Trimble Connect AR?
FREE Trimble Connect Training
We offer two free training webinars for users and for BIM Coordinators and other advanced users:
Getting started with Trimble Connect
Advanced use of Trimble Connect in production
In Norwegian AND English! You can choose :)
More Trimble Connect Quick Tips


OTHER ARTICLES